Lets you send your code over usb via an FT232h very very fast. See video below.
Basically it’s an FT232h hooked up to the expansion bus with a small app that runs from memory card built using freepsxboot. The code is so small it boots very quick.
Whenever I think of PlayStation, nothing excites me more than plugging something new into it. And what could be more exciting than one of those cheap ass cheat carts from AliExpress.
There are a lot of these around on various auction sites. I bought one to see if it could be flashed with unirom and to see exactly what’s inside it. They are around £7.50! on eBay UK, which is pretty much what you end up paying from AliExpress.
The device itself
First thing to notice is the lack of comms port. Don’t be upset, you wouldn’t have used it anyway. The 74hc245 that is used to drive the port is also missing.
We can see we have a Am29F010 1megabit EEPROM which means it’s flashable. Also the standard PAL/GAL that handles the chip select for the eeprom, data link (if it were present) and logic for the switch. All pretty much standard fayre for an Action Replay clone.
We also have pads on the PCB for a PLCC EEPROM which could be used in lieu of the TSOP32 on the board.
Software wise.. first boot gets you this. It’s in NTSC. If you are PAL like me you can change this by pressing L1+R1 and SELECT. Then press O to confirm. Standard Caetla rip off like you see on most of these carts.
High Speed Golden Finger. Ouff sir!
So can it be flashed with something else? Sure, Unirom supports this EEPROM and successful flashed it (you need to use unirom_standalone). See below for this in action
You can also probably flash something like the original AR/GS ROMs to them too if you wanted to. All these ROMs are available on the unirom disc itself.
In summary.. for what they cost delivered to the UK you can get one of these and they aren’t bad at all! I’d rather buy one of these than line some scalpers pockets on eBay for something *rare*.
I was having a bit of a tidy up and found a simple app I put together for the Raspberry Pi. It allows you to communicate with the standard Xplorer/Xplorer64 rom software for a handful of useful functions.
The software will work on any of the 40 pin GPIO Pi’s from the b+ upwards. I use this software on a ZeroW and it works perfectly on both PSX and N64.
Currently supported commands :-
Command
FX4.2
PRO 2.0
XP_1.9
XP_64
/status
*
*
*
*
/mcstatus*
*
X
X
X
/reboot
*
*
*
X
/freeze*
*
*
*
X
/unfreeze*
*
*
*
X
/peek
*
*
*
X
/view
*
*
*
X
/upload
*
*
*
X
/download
*
*
*
X
/execbin
*
*
*
*
/exe
*
*
*
X
= Tested OK X = Incompatible ? Untested
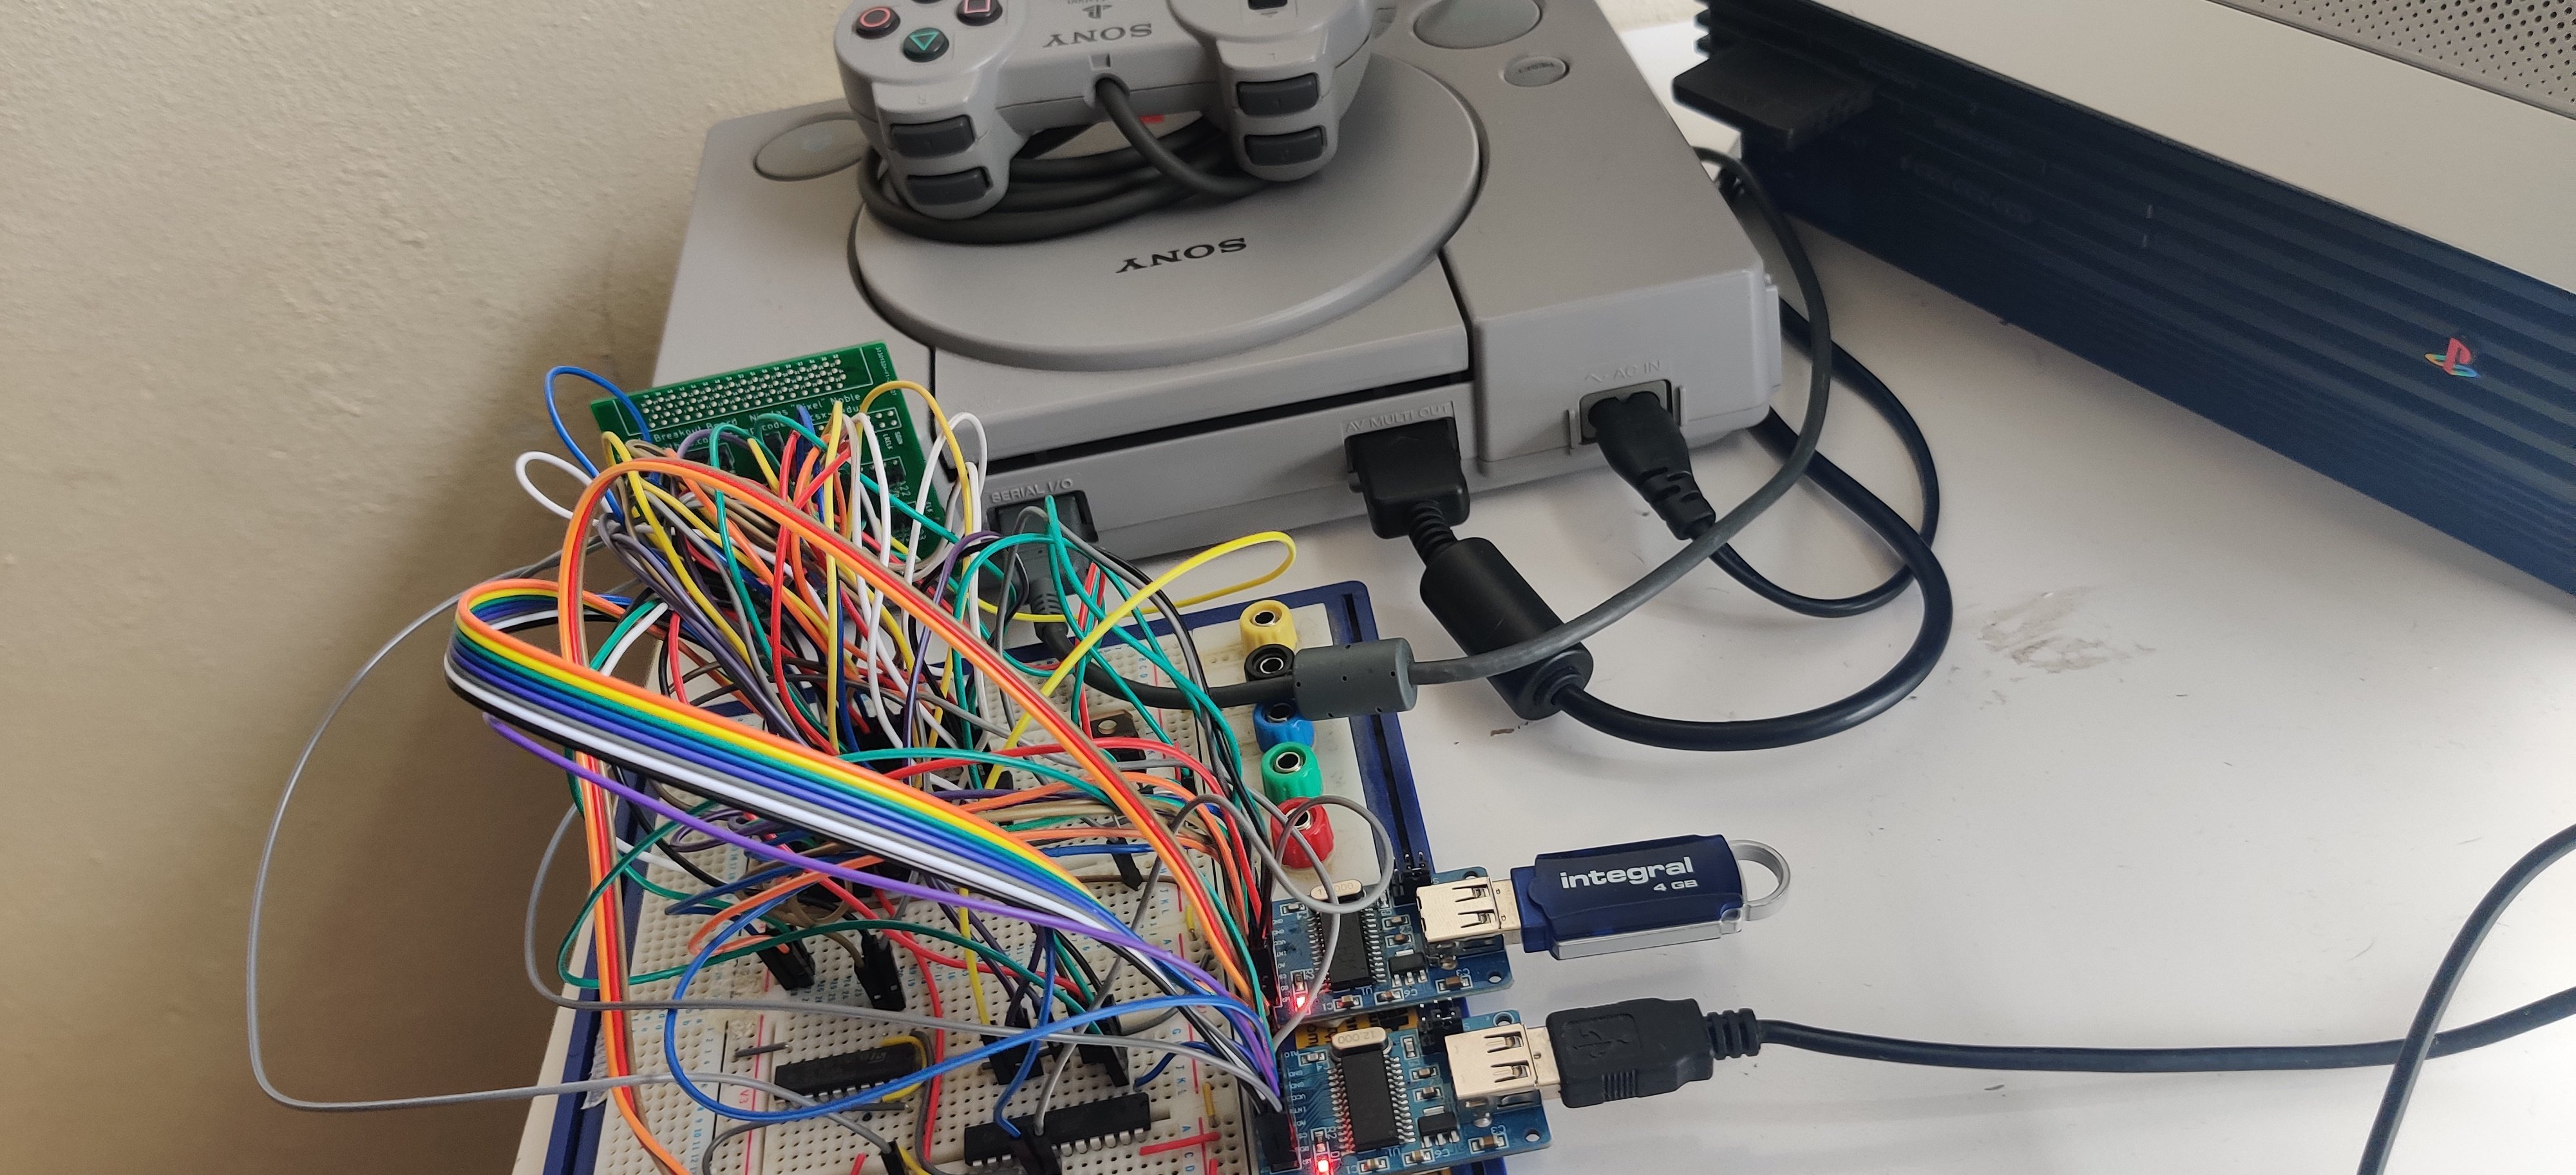
This was my test setup. You really need to be using level shifters due to the Pi being 3.3v and Xplorer being 5v. However, in the image below I modded the cart so the 74’373/245s are running at 3.3v.
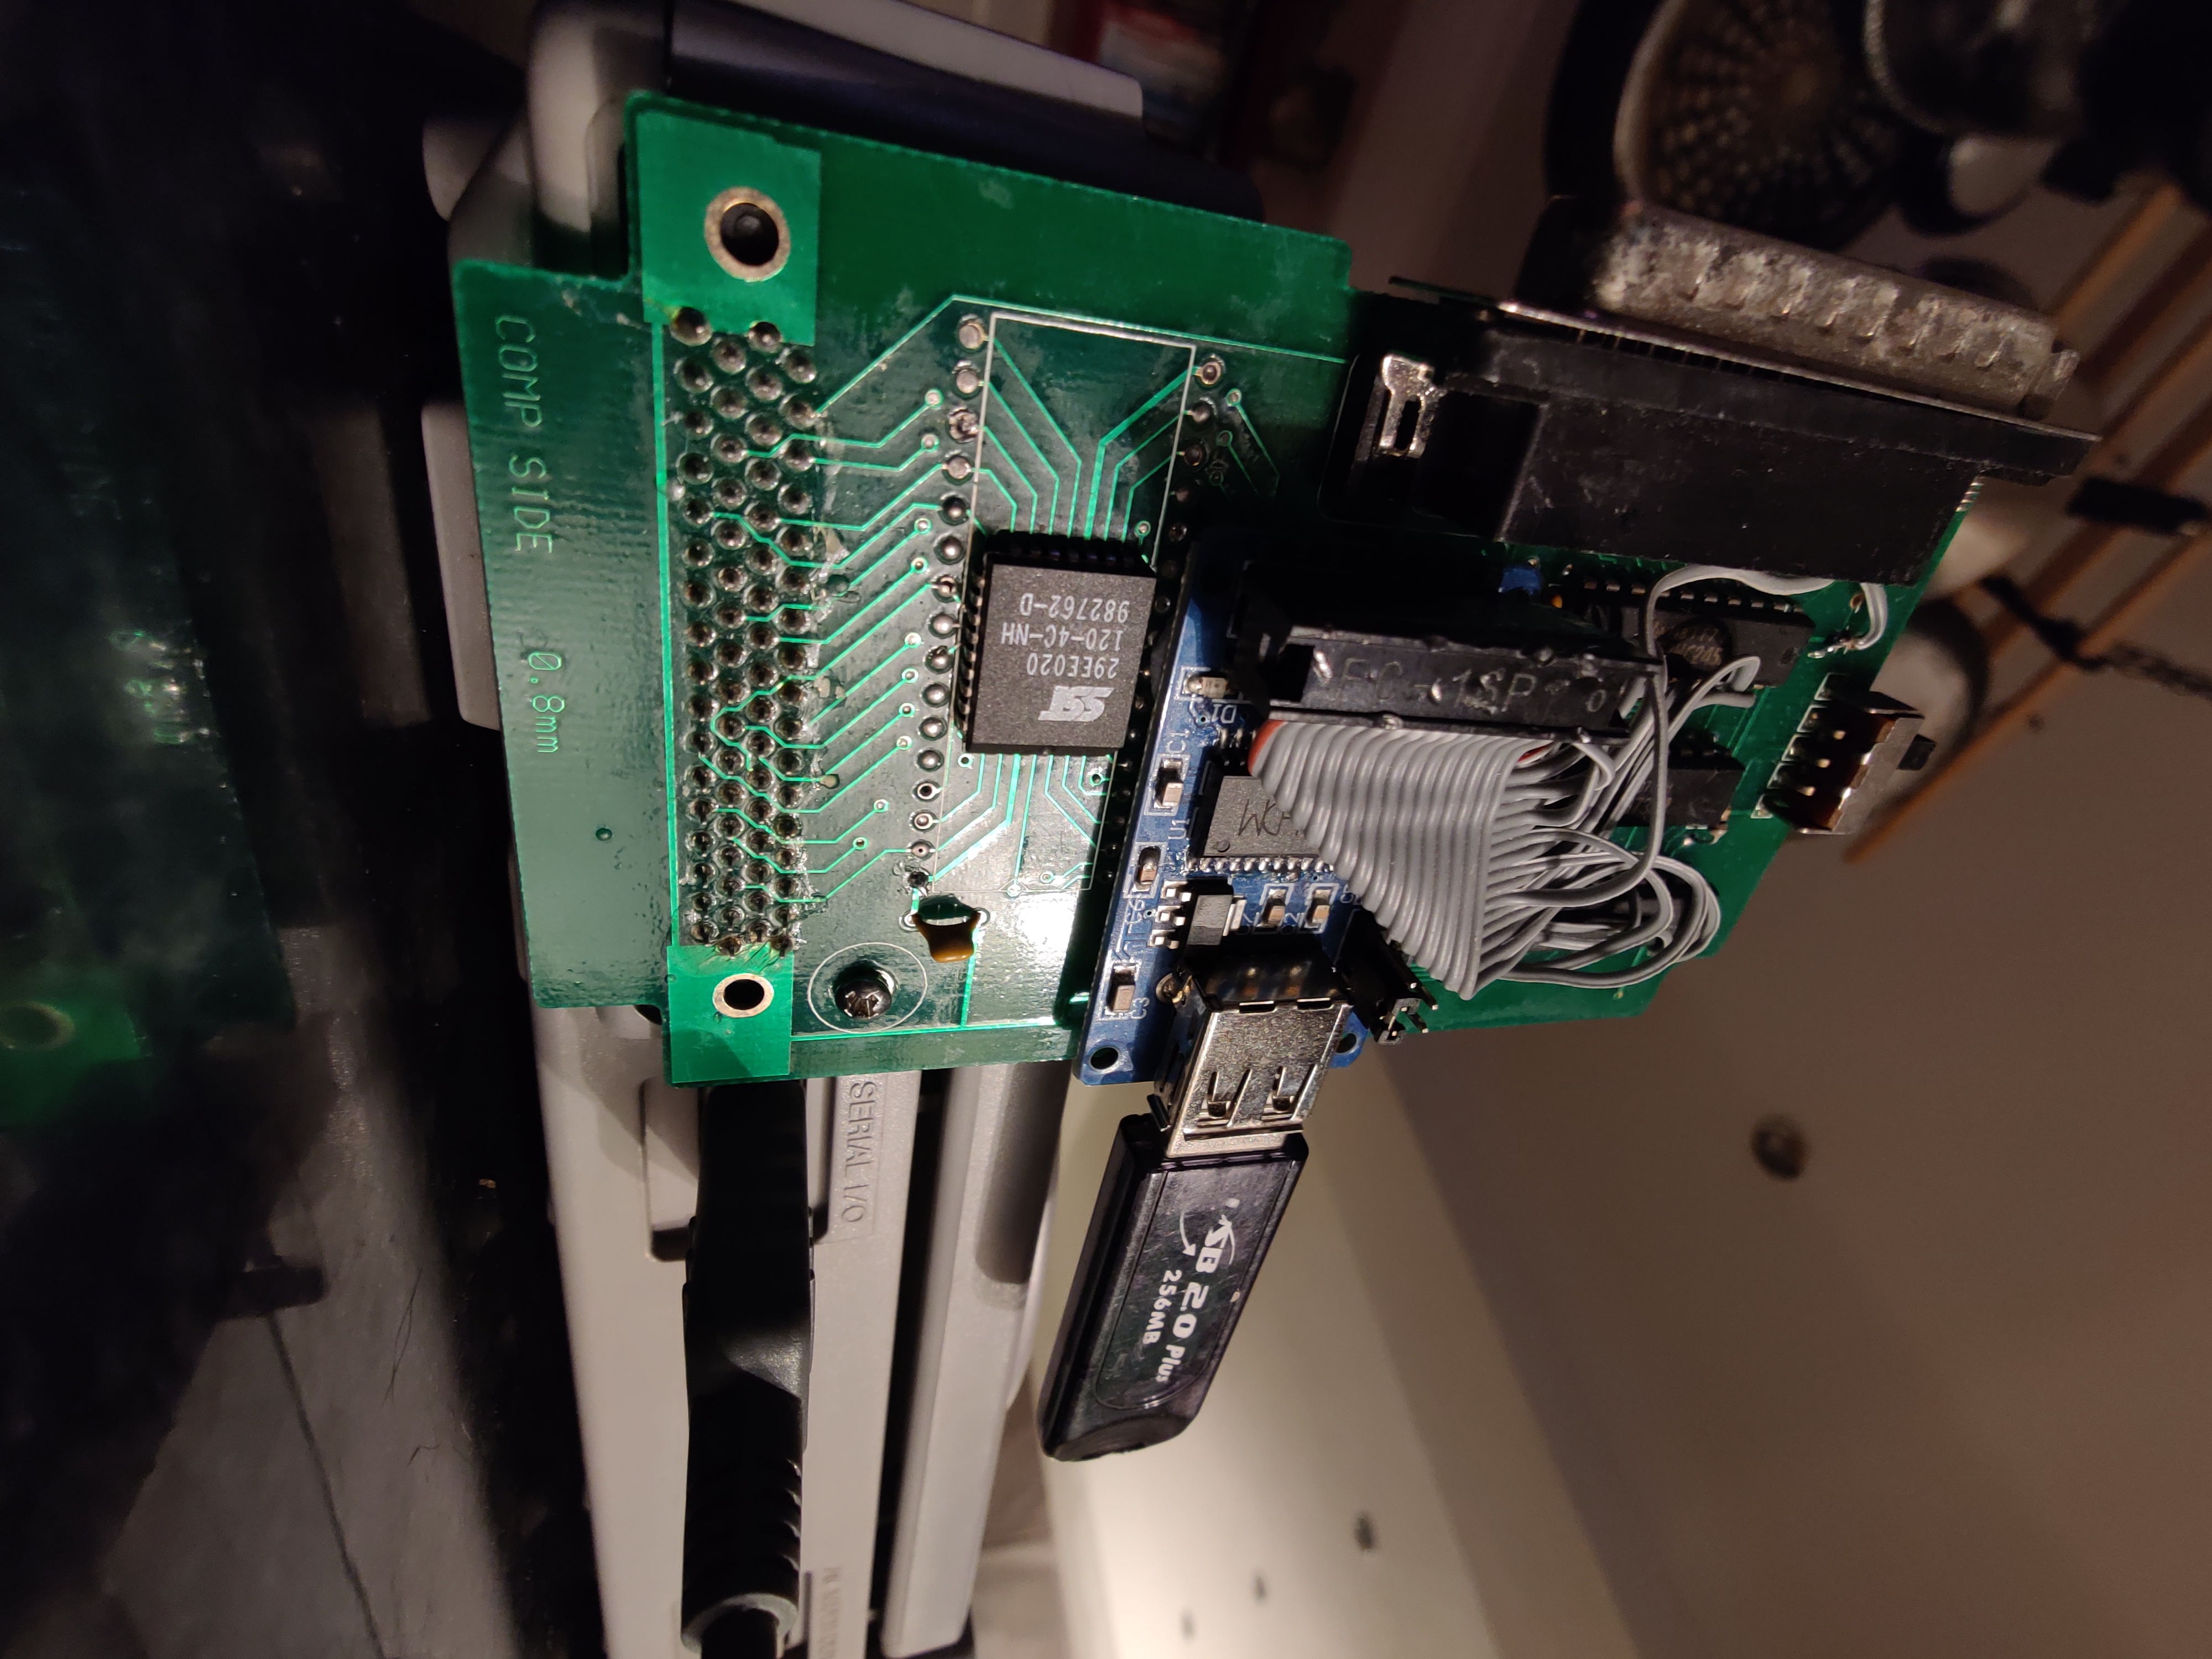
So the image at the top of this blog is the cart I use as a basis for many of my experiments since last year. Nicolas Noble was kind enough to design a simple ‘shield’ like board PCB for me so I did not have to suffer the pain of dupont cables. This board attaches to his PIO Breakout board, which you can find in the pcsx-redux repository https://github.com/grumpycoders/pcsx-redux/wiki/PIO-Breakout.
It provides a eeprom you can boot from (useful for unirom/whatever) and also with the addition of the ATF22v10c and CH375/6 can be a useful tool for USB experimentation.
I haven’t done much with its development or documentation and thought I would make a start – https://github.com/danhans42/pio_breakout_shield. Not much there at the moment but I will start chipping away at the documentation and also add a few different configurations.
I keep seeing loads of messages, posts and whatnot of people having issues with aftermarket Playstation 1 memory cards they have purchased online from various marketplaces. For example here https://www.ebay.co.uk/itm/-/192410771741
card purchased from AliExpress
There can be many reasons for this but the general one is.. you got scammed!
Basically a lot of the cards coming out of China have the wrong capacity flash part fitted inside. PS1 memory cards are supposed to be 1 megabit (128kilobytes), however these cheap cards have a 29EE512 fitted to them, which is half a megabit (64kilobytes).
Card teardown
This is not to say these cards are useless, you can use the first 7 blocks if you are careful, just beware using them for that epic FF IV or GT2 save you have, and make sure you backup. They are also a great candidate for installing freepsxboot to if you know what you are doing.
To install freepsxboot to one of these cards we basically need to duplicate the lower 64k of the .mcd image we are using into the upper 64kb. Reason being we dont have a high address line in use (A16) as used on a 128k part, so when the card goes beyond 64k it just writes over the start again rather than writing to what would have been the upper 64kb. Only other thing you could do is to source a 29EE010 in the same package and retro fit it – probably not worth the hassle but A16 is used by the ‘blob’ on the card so theoretically it should work.
Moral of the story.. dont buy these unless you know what you are doing. There are plenty of second hand and aftermarket cards out there that will be the correct capacity.
On a positive note though, these can be had for as little as 37pence on Aliexpress, so its a cheap source of 29EE512’s 🙂
I’ll add more when I find time but have moved away from using PsyQ on dosbox and am now using sicklebricks bare GPU+pad example code as a base for these experiments. So far so very bloody good. Check it out (I’ll add the link soon)
Have had to switch back to sio for code upload duty as the usb controller is in use for host duties. I’ve got data transfer to pc working reliably in both directions now.
Also, am fleshing out the code with a usb stick browser using the inbuilt support offered by the ch376.
Thanks go out to sicklebrick for the examples and help, Nicolas noble for pcsx-redux openbios stuff. Also, big mention for Team Shinra.. they are an Amstrad demo group who have used the ch376 with the CPC.. their basic examples were invaluable in early tests.. thanks – I’ll be rigging one up to my CPC464 soon 🙂
(add links)
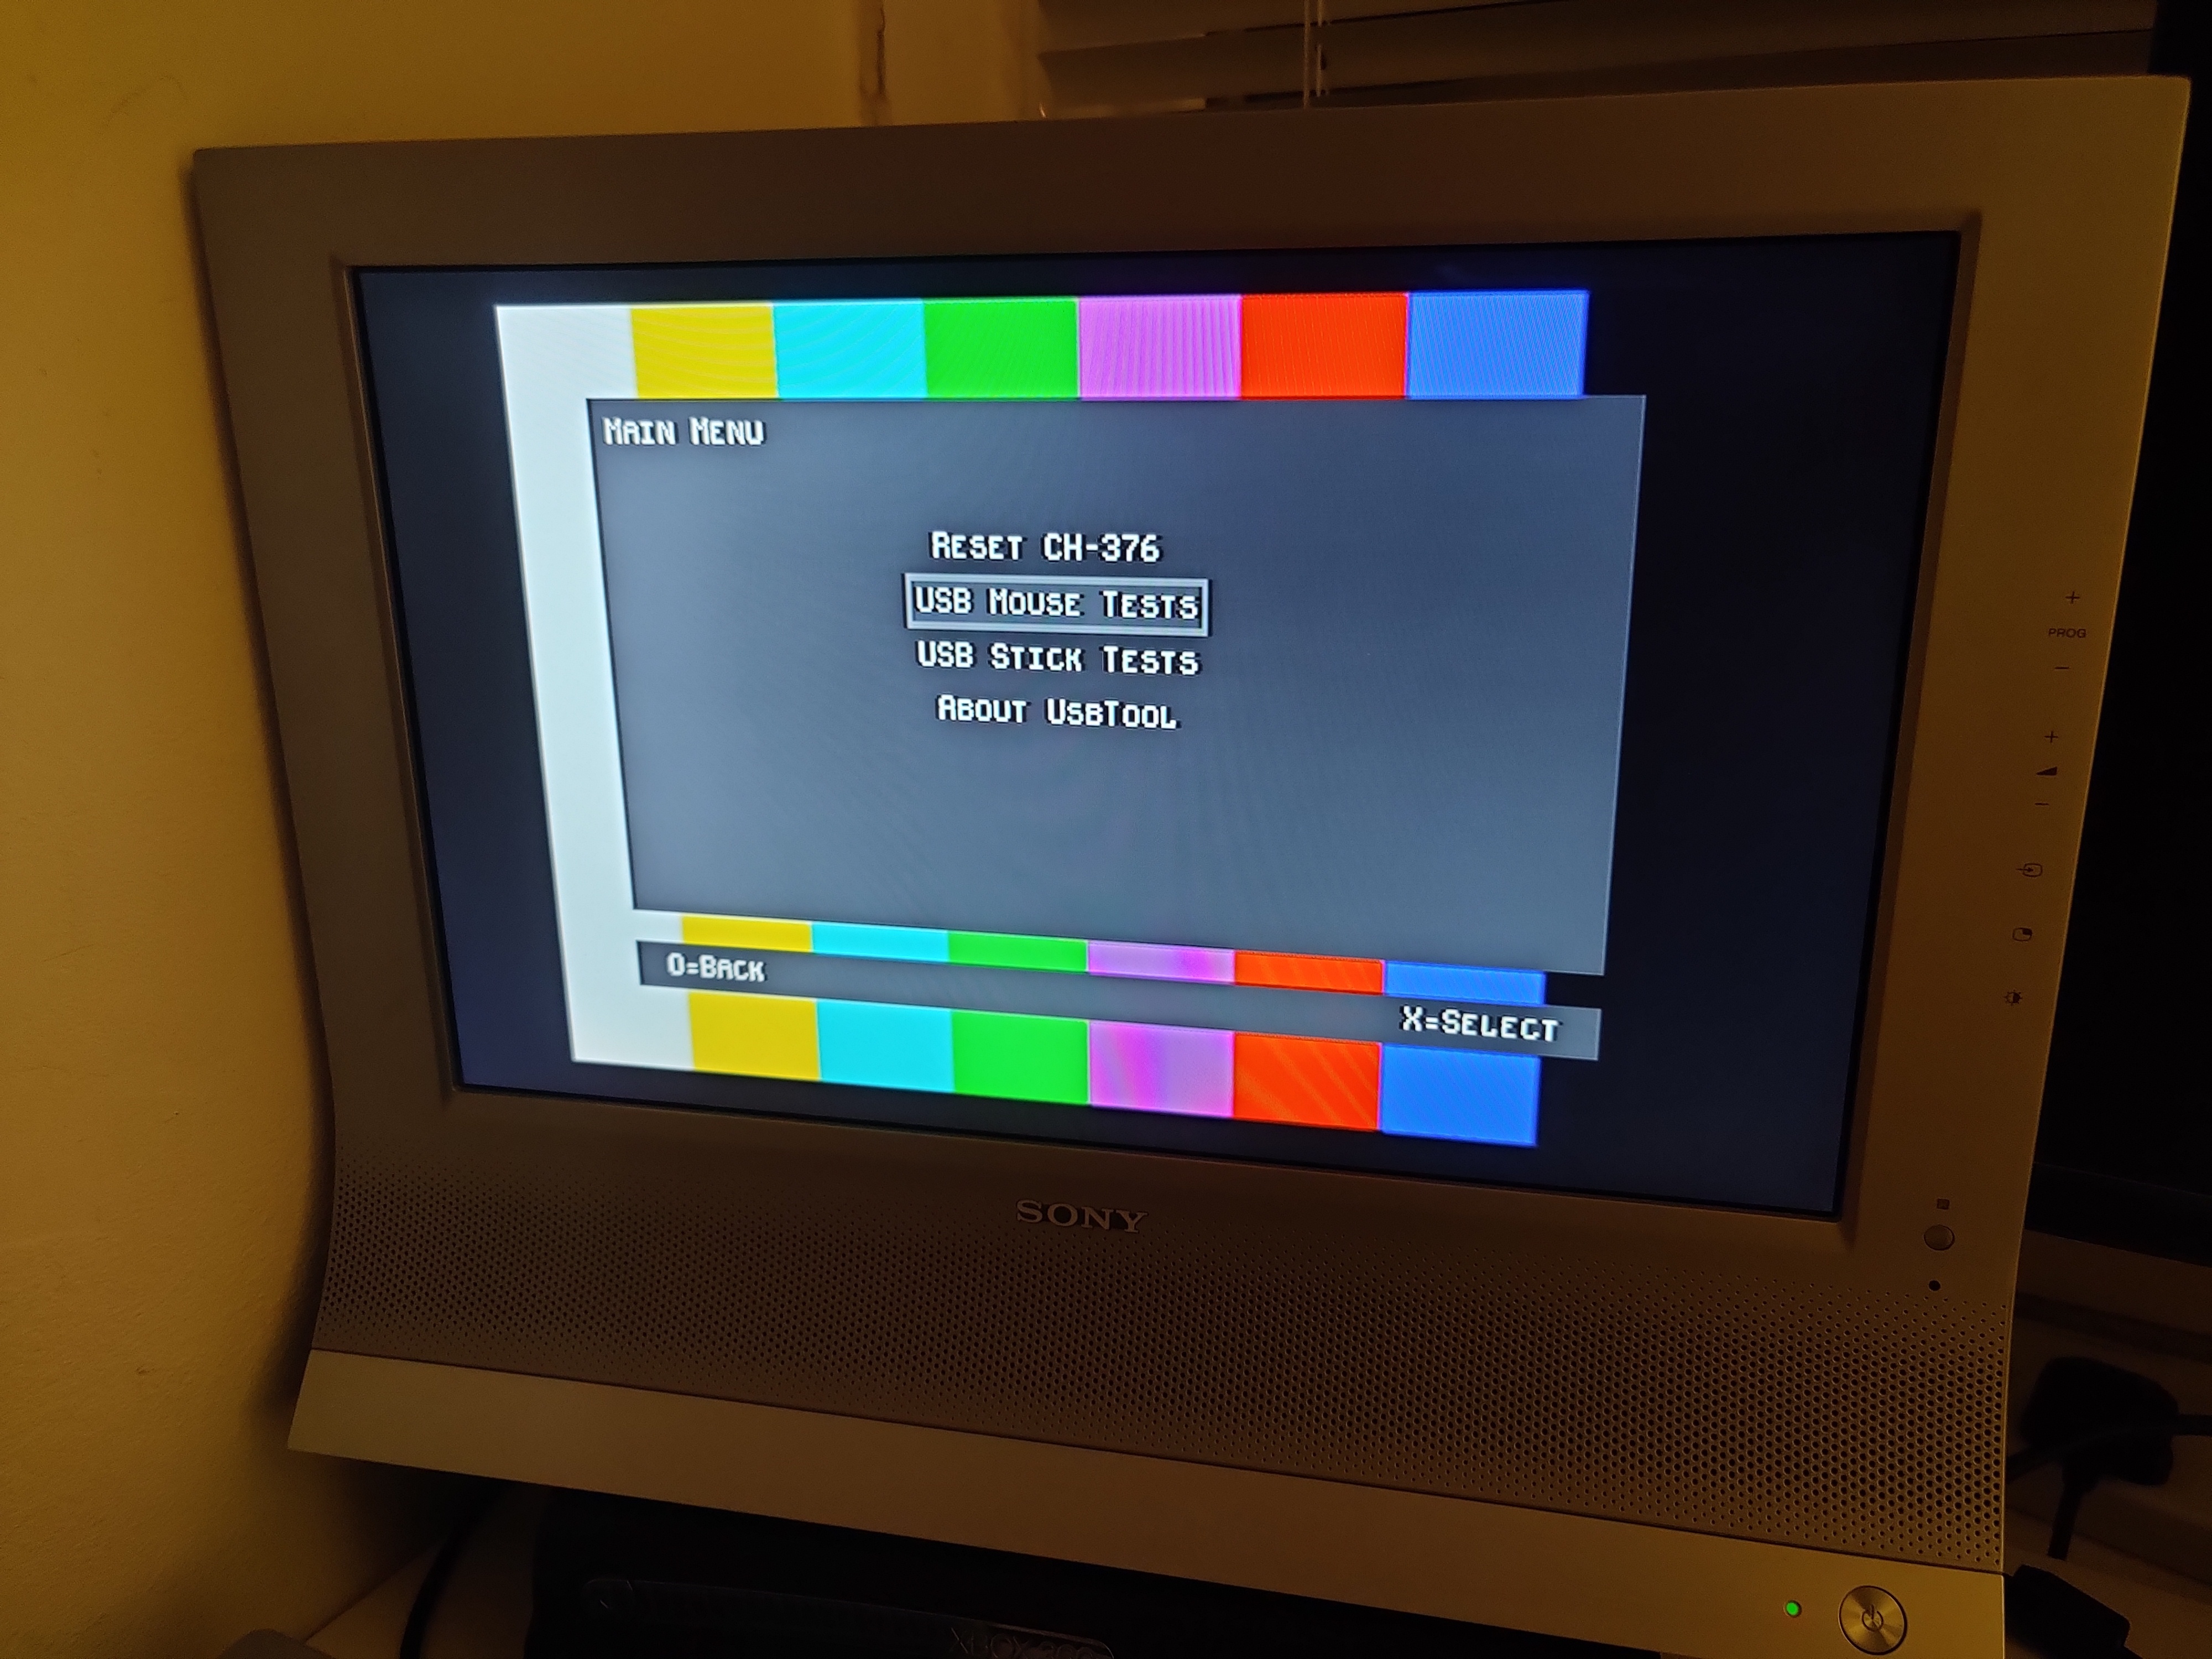
Few screenshots below.
Oh.. and I made pong from scratch using the same code stuff.. I’m in the process of tidying it up and ill stick it up on GitHub. Be a easy thing to understand for anyone new to PSX home-brewing.
Since my last update haven’t done a great deal other than adding a second CH376 to my setup.
Main reason being, I can use one for Comms as a device and use the other as a host for connecting devices to. It was getting tricky juggling things around so thought this would make life easier.
The usb controller for Comms is working pretty well, psx-pc uploads are flakey but I can sort that later when I actually draft up some sort of packet based protocol to resend stuff when usb is busy. Sure it’s something simple, but chipping away at it was boring me so I needed to change to something else.
So got back to usb mass storage. Initially I was looking at using the 375.. however the 376 supports FAT12/16/32 so meant less work psx side. However, the documentation is difficult to read which has slowed progress.
So far I’ve got it mounting the usb stick fine, reads the size of the first partition and returning its size and free space. Also getting a directory listing. Next up is to get it to open a file and load it into memory. The screenshot below shows the debug output into a serial monitor. Nothing major.. but progress nevertheless 😁